Get fast, private browsing on your iPhone with Avast Secure Browser
- Security
- Privacy
- Performance
A supercharged Mac is just one RAM upgrade away. We’ll help you prep your device and walk you through the steps to add RAM on a range of Mac products. If you need a MacBook Pro RAM upgrade, an iMac RAM upgrade, or a memory upgrade for another Mac model, we’ve got you covered. Then, get a specialized cleanup tool to keep your computer optimized.
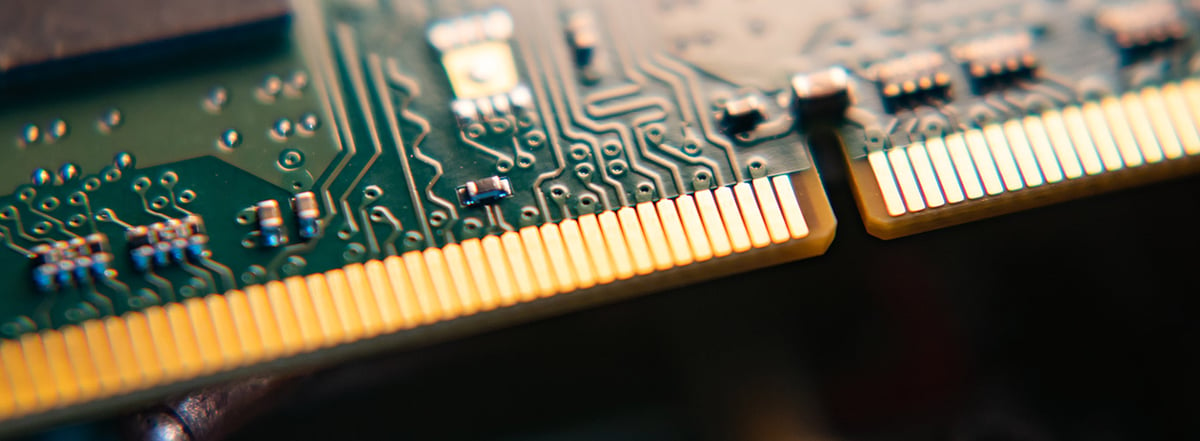
The process for upgrading Mac memory (RAM) depends on your Mac version — it’s not possible to upgrade RAM on some models, like a MacBook Air. If you can upgrade RAM on your Mac, it’s usually done by removing the case and replacing the old RAM modules with new ones.

This Article Contains:
Below, you’ll find detailed steps on how to upgrade RAM for the following Mac devices: MacBook Pro and MacBook, iMac, Mac mini, and Mac Pro. Although there are differences between specific Mac models, you can use this guide for most devices.
Unfortunately, not all MacBooks or MacBook Pros allow for a RAM upgrade — it depends on the model and year of your device. After checking if a MacBook Pro RAM upgrade is possible for the model you have, you’ll need to locate the RAM module by opening your device from the bottom part of the case.
Here’s how to upgrade RAM on a MacBook Pro or MacBook:
Turn off your MacBook Pro or MacBook and let it cool down completely. Disconnect all cords, cables, and accessories.
Flip your computer over so it’s lying face down.
Remove the bottom case by unscrewing it. Not all of these screws may match, so note where each screw belongs.
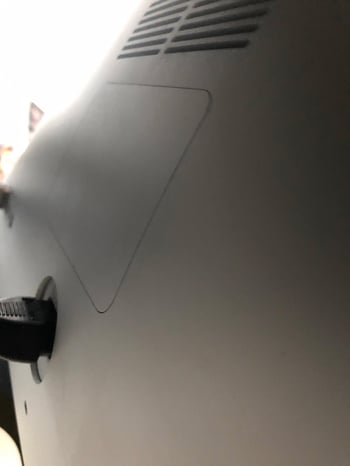 The underside of a MacBook Pro.
Touch a metal surface inside the computer to discharge any static electricity from your body.
Find the RAM module and eject it by using the ejection levers.
Gently Pull out the RAM module — avoid touching the gold connectors.
Repeat for the other RAM module, if available.
Insert your new RAM module(s) for your MacBook Pro or MacBook — again, avoid touching the gold connectors.
Push the new module down until it clicks into place, then insert the second one.
Replace the bottom case and screw it back on.
A MacBook and MacBook Pro RAM update is only possible with older models, and all 17” MacBookPro models. Unfortunately, you can’t upgrade RAM on any MacBook Air devices.
Here are the MacBook Pro and MacBook models that you can upgrade memory on.
MacBook: all models from 2008-2011.
MacBook Pro: 13” models from 2009 to 2012; 15” models from 2008 to 2012; all 17” models.
You can install memory on all iMacs, except newer 21.5” models. Depending on your iMac, the location of your RAM ports may vary, so the first step in an iMac RAM upgrade is determining the model and year of your iMac.
The location of RAM ports on iMacs varies according to the model. On 27” iMacs from late 2012, RAM is stored behind a door on the back of the device. On pre-2012 27” iMacs, older 21.5” iMacs, and older 20” and 15” iMacs, RAM is stored along the bottom edge.
27” iMacs from late 2012 and after store RAM behind the door in the back of the unit. Here’s how to do an iMac RAM upgrade:
Shut down your iMac, let it cool down completely, and disconnect all cords and cables.
Place a soft towel or cloth on your work surface, then carefully lay the computer face down.
Press the button under the memory storage door to open and remove the door.
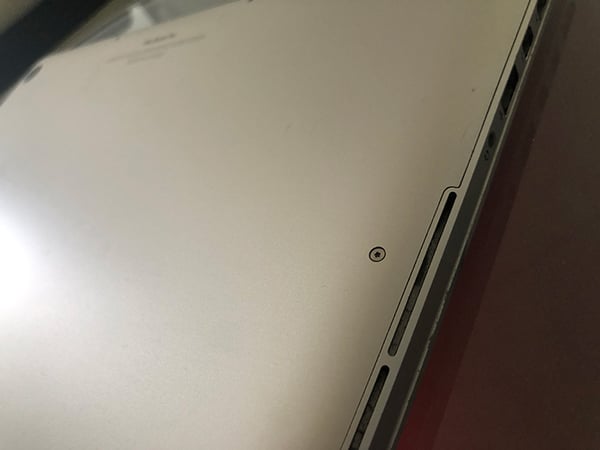 An iMac memory storage door.
On the bottom of the door, check the diagram that displays the memory-cage levers and the correct orientation of the RAM modules.
Push the two levers outwards to unlock the memory cage, then pull them up. You can now remove each module by pulling it up.
Insert a new RAM module. All new RAM modules should be oriented the same way as the RAM modules you just removed. Push the new RAM gently into the slot until it clicks into place.
After swapping out your old DIMMs (dual inline memory modules) for new ones, push the memory levers back down until they click into place.
Replace the memory storage door.
Turn your iMac upright again and reconnect all the wires and cables.
Turn on your iMac. It’s normal for your iMac to stay dark for about 30 seconds — it’s initializing the new memory.
Pre-2012 27” iMacs, eligible 21.5” iMacs, and older 20” and 15” iMacs all store RAM along the bottom edge of the device. Here’s how to upgrade memory on these older iMacs:
Shut down your iMac, let it cool down completely, and disconnect all cords and cables.
Place a soft towel or cloth on your work surface, then carefully lay the computer face down.
Remove the memory access door with a Phillips-head screwdriver.
Depending on your iMac model, you’ll see either a set of pull tabs or ejector clips. Untuck and pull the tabs, or open the clips. This will eject the current RAM module so you can remove it.
Insert your new RAM cartridge and gently push it into the slot until it clicks into place.
If your iMac has pull tabs, tuck them back in above the new RAM module. If it has ejector clips, close them.
Reinstall the memory access door with your Phillips-head screwdriver.
Return your computer to an upright position and reconnect all your cords and cables.
Start up your iMac. Some pre-2017 iMacs will beep if they detect RAM problems. If this happens, make sure your new RAM module is compatible with your iMac and try reinstalling it.
You can update RAM on any iMac except the following 21.5” models:
Retina 4K, 2017 & 2019
2017
Late 2015
Mid-2014
Late 2013
Late 2012
The model and year will determine whether your Mac mini allows for RAM upgrades. Once you check your Mac mini model to see if upgrades are possible, you can proceed to the steps.
Here’s how to upgrade RAM on a Mac mini:
Turn off your Mac mini, let it cool down, and disconnect all cords and cables.
Turn the device upside down and rotate the bottom case counterclockwise to unlock it.
Press down on one side of the cover to tip the other side up, then remove it.
Open the clips on either side of the RAM module to pop it out, then remove the RAM module from the slot. Repeat this process for the module underneath.
Insert new memory modules into the bottom slots, ensuring you align the notches. Press down on the raised edge until it clicks into place.
Repeat for the upper module.
Replace the bottom cover and reconnect all cords and accessories.
Restart your Mac mini.
A Mac mini RAM upgrade is simplest with models between 2010-2012. Mac minis from 2018 and later are more difficult to upgrade. And you can’t add RAM to Mac minis from 2014.
The Mac Pro has undergone many redesigns. And although our steps are for newer models, the basic procedure for updating memory on Mac Pro can be used for older designs too — including the iconic “trash can” Mac Pro from 2013. And you can upgrade RAM on all Mac Pro devices.
Here’s how to perform a Mac Pro RAM upgrade:
Shut down your computer and let it cool down completely. Disconnect all cords and cables.
Touch the Mac Pro’s metal casing to discharge any static electricity from your body.
Unlock the case by rotating the latch 90 degrees counterclockwise.
Pull up on the latch to remove the case.
Move the RAM cover switch to the left to unlock it, then remove the RAM module covers.
Push your new RAM module gently into the slot until it clicks into place. Hold it by the edges or corners, and avoid touching any of the gold connectors.
Replace the RAM module covers.
Replace the computer case, then return the latch to the locked position by rotating it 90 degrees clockwise.
Plug in all your cords and cables, then turn on your Mac Pro.
Upgrading your RAM helps to improve performance and speed up your Mac. Adding RAM memory helps your Mac handle more demanding tasks, and improves its multitasking capabilities. A RAM upgrade also helps your Mac keep up with increasing computing and gaming demands.
Coupled with checking Mac storage (including Other storage on Mac) and deleting excess files, a RAM upgrade will reinvigorate your Mac — possibly adding years to its life.
Of course, there’s always a risk when tinkering with your Mac’s components — like voiding your manufacturer warranty or accidentally compromising sensitive hardware. But, a RAM upgrade is much cheaper than buying a new Mac device. For a DIY Mac memory upgrade, you’ll only need to buy RAM modules.
If your Mac is still compatible with your programs and apps, a RAM update might be all you need to revitalize your device. To further improve performance, you can also consider upgrading your Mac with an SSD drive.
Not all RAM modules are compatible with all Macs. For instance, MacBook RAM requirements may be different from other Mac devices. So before making upgrades, check your RAM to determine what kind and how much RAM you need.
Here’s how to check your Mac’s RAM:
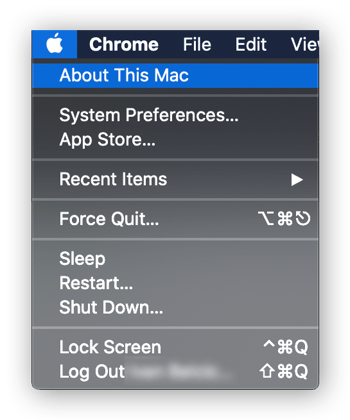
Open the Apple menu and click About this Mac.
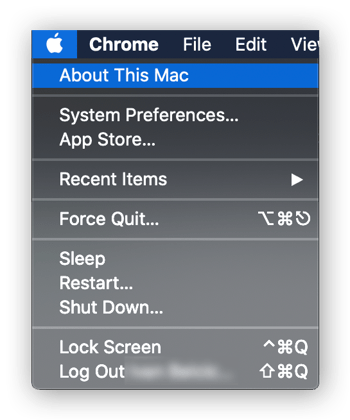
In the Overview tab, you’ll get a basic rundown of your Mac. Next to Memory you’ll see your current amount of RAM.
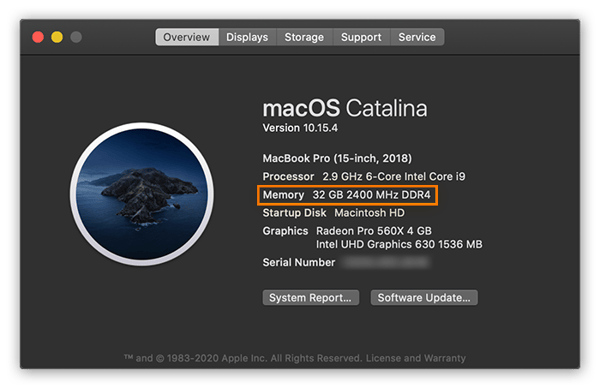
The amount of RAM you can add depends on your Mac’s model and year. Use Apple Support to check the memory specifications and max RAM capacity for your MacBook or MacBook Pro, iMac, Mac mini, or Mac Pro.
While checking your system preferences, use our Mac security guide to optimize your Mac device for more complete protection against threats.
No, you can’t upgrade RAM on all Mac modules. While all Mac Pros can be upgraded, you need to look up your Mac device’s model and year to see if you can add RAM to your MacBook Pro. Here’s how to find that info:
Open the Apple menu and click About this Mac.
In the Overview tab, you’ll get a basic rundown of your Mac specs, including the model and year of your Mac device.
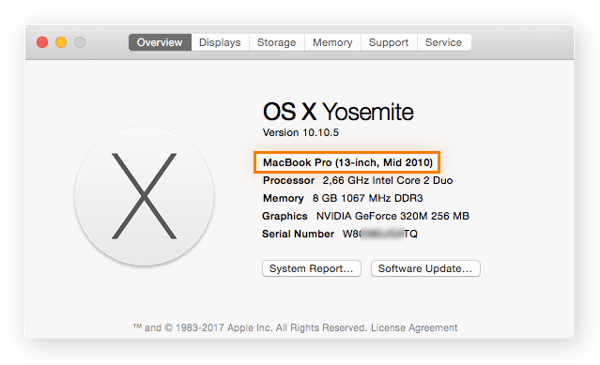
Using the Mac specifications from the overview, you can check the memory specifications for your Mac devices on the Apple Support site.
Here’s a chart to help you know if you can upgrade RAM on your Mac:
|
Mac device |
Models that allow RAM upgrade |
|
MacBook Pro |
All 13” models from 2009-2012 All 15” models from 2008-2012 All 17” models |
|
MacBook |
All models from 2008-2011 |
|
iMac |
All models from 2009-2011 |
|
Mac mini |
All models from 2010-2012 |
|
Mac Pro |
All models |
|
MacBook Air |
Not possible to upgrade |
For most daily activities — like basic web browsing and editing documents — 8 or 16GB of RAM is plenty. If you use your Mac for more demanding tasks — like 4K video editing or gaming — you might need to increase your RAM to 32GB for smoother performance and to prevent your Mac from overheating.
The amount of RAM you need depends on your computing habits. If you’re just looking for a general performance boost, try uninstalling unused apps on your Mac, which take up valuable RAM. Then, to help determine the optimal RAM for your device, test your Mac’s performance and go from there.
When shopping for Mac RAM, you have four main options: buy from Apple directly, buy from an aftermarket supplier, buy from a certified refurbisher, or get it secondhand. All options come with varying costs and advantages (or risks).
Here’s how Mac RAM suppliers stack up:
Buying RAM from Apple is your most secure option. It’s an official Apple component protected with warranties and return policies. But, it’s also the most expensive.
Here are the latest market prices for RAM from Apple:
|
Mac memory component (RAM) |
US store price |
|
16GB DDR4 2666MHz SO-DIMM (2x8GB) |
$400 |
|
32GB DDR4 2666MHz SO-DIMM (2x16GB) |
$800 |
|
64GB DDR4 2666MHz SO-DIMMS (2x32GB) |
$1,200 |
If you’re buying a new Mac, many models (like the MacBook Air) are only upgradeable at the time of purchase — a home RAM upgrade later won't be possible. So, consider your RAM requirements before purchasing a new Mac device.
Buying Mac RAM from aftermarket suppliers is generally less expensive than buying from Apple. You can find plenty of reputable suppliers online — just read reviews from other shoppers before buying. Many suppliers also provide warranties for added peace of mind.
You can buy previously-used RAM from Apple at a lower price than buying it new. Other companies also sell “certified refurbished” RAM approved by Apple. You can expect warranties and return options for refurbished RAM — but since it’s used, coverage usually doesn't last as long as a new product.
Typically, your cheapest option is to buy used RAM from sites like eBay or AliExpress. Although cost effective, secondhand RAM is risky because it usually doesn’t include a return policy or warranty. If you buy the wrong RAM or if it malfunctions, you’ll likely be stuck with the purchase.
Although a RAM upgrade will improve Mac performance, it’s not always an option. If RAM is too expensive or your Mac doesn’t allow for an upgrade, try a comprehensive performance tool to speed up your Mac and give it the boost you need.
Avast Cleanup revitalizes your Mac by clearing out the junk that’s clogging up your system. Our dedicated cleanup tool gets rid of duplicate files, bloatware, and useless apps to create more storage space and get your Mac working like new. Whether or not you update your RAM, Avast Cleanup will breathe new life into your Mac. Try it for free today.
Try Avast Cleanup for free to remove junk, clear out duplicate files, and free up space. Enjoy a cleaner Mac and more memory.
Try Avast Cleanup for free to remove junk, clear out duplicate files, and free up space. Enjoy a cleaner Mac and more memory.
Try Avast Cleanup for free to remove junk, clear out duplicate files, and free up space. Enjoy a cleaner Mac and more memory.
Try Avast Cleanup for free to remove junk, clear out duplicate files, and free up space. Enjoy a cleaner Mac and more memory.
Get fast, private browsing on your iPhone with Avast Secure Browser
Supercharge your Android and clean up apps with Avast Cleanup