


Protect your iPhone from threats
with free Avast Mobile Security
Missing your clean Mac? Over time, Macs get cluttered up with unnecessary junk files, which take up valuable disk space and create problems and slow-downs. Ditch those junk files with a disk cleanup on your Mac! Our guide ensures you know exactly how to clean up your Mac’s hard drive safely and efficiently. Let’s rediscover that fast computer
you used to love.

Your Mac was probably shiny and clean — not to mention blazing fast — out of the box. But similar to other items you use frequently, Macs get dirty over time. We’re not talking about dirt or dust (though those can also build up) but the digital cobwebs of old forgotten apps, duplicate files, and other junk data. It accumulates, bogs you down, and it isn’t necessary. Doing regular Mac cleanups will ensure you have a lean, mean, well-performing machine.

This Article Contains:
There are many types of files that can accumulate on your Mac and eat up your valuable space, without you even realizing it. Just a few of the most common space-gobbling offenders on Macs are:
Temporary files: The programs you use (and Apple’s own operating system) create thousands of cache files and temporary data in order to work properly in the moment. They’re unnecessary later — but they don’t get removed. And even if you delete an app, its temporary files still remain.
Duplicate files: Most people fill up quite a lot of space by accidentally saving large files — like movies and photos — twice.
Files you thought you trashed: Putting files in Trash doesn’t actually delete them. They hang around, still taking up disk space.
Blurry photos: In the age of smartphone cameras, it’s easy to take dozens of photos while seeking the perfect shot. But do you really need duplicate photos, or pictures that are blurry or otherwise low-quality? Image files are large, and can take up a lot of your storage.
From unnecessary files to apps to photos, let us take you through the most thorough Mac cleanup. Better performance is waiting just around the corner, so let’s jump in.
Over the years, you’ve no doubt downloaded and used dozens of applications. Do you really need all that software anymore? The answer is likely “No,” and it’s not just for your peace of mind. Many installed apps include background processes and startup items which slow down your Mac, and they all consume disk space. It’s time to uninstall apps you no longer need:
On your Mac desktop, click Go, then click Applications. In the top corner of the window, click the little grid icon and order your apps by Date Last Opened:

Now you’ll see which apps you haven’t used in ages. Many of the items listed here eat up your disk space and decrease performance. To delete them, drag them from this window into your Trash to get rid of them. Rinse and repeat this for every application you no longer need to clear disk space on your Mac.
You can automate this process by using a dedicated app uninstaller tool such as Avast Cleanup for Mac. This will regularly help you identify outdated apps and enable you to get rid of multiple obsolete apps at once.
Once you’ve installed Avast Cleanup for Mac, click on Uninstall apps. In the next screen, click Unused apps, which will show you apps you haven’t used in the last six months, or click Large apps to detect monstrosities that take up more than 1 GB. Alternatively, you can sort by size or date right from the first screen:
 Select the apps you don’t need and hit the Uninstall button. Avast Cleanup will get rid of one app after the other.
Bonus tip: Over time, some apps gather a huge amount of temporary data. Below, we show you how to delete these temporary files from macOS and specific apps, but if that doesn’t work, you might want to completely delete the app and reinstall it. Consider Google Chrome: Some unfinished downloads or certain types of websites tend to store “supporting data,” which is hard to track down. The easiest way to delete all this unnecessary data is to get rid of the app and reinstall it.

Here you can see how much unnecessary data Google Chrome has accumulated!
Are you always randomly saving photos, music, downloads or documents all across your disk in a bunch of random folders? Luckily, macOS has a few built-in tools that help you detect files you might’ve long forgotten about. Here’s how these work:
Click on the little Mac icon in the top-left corner and select About this Mac.
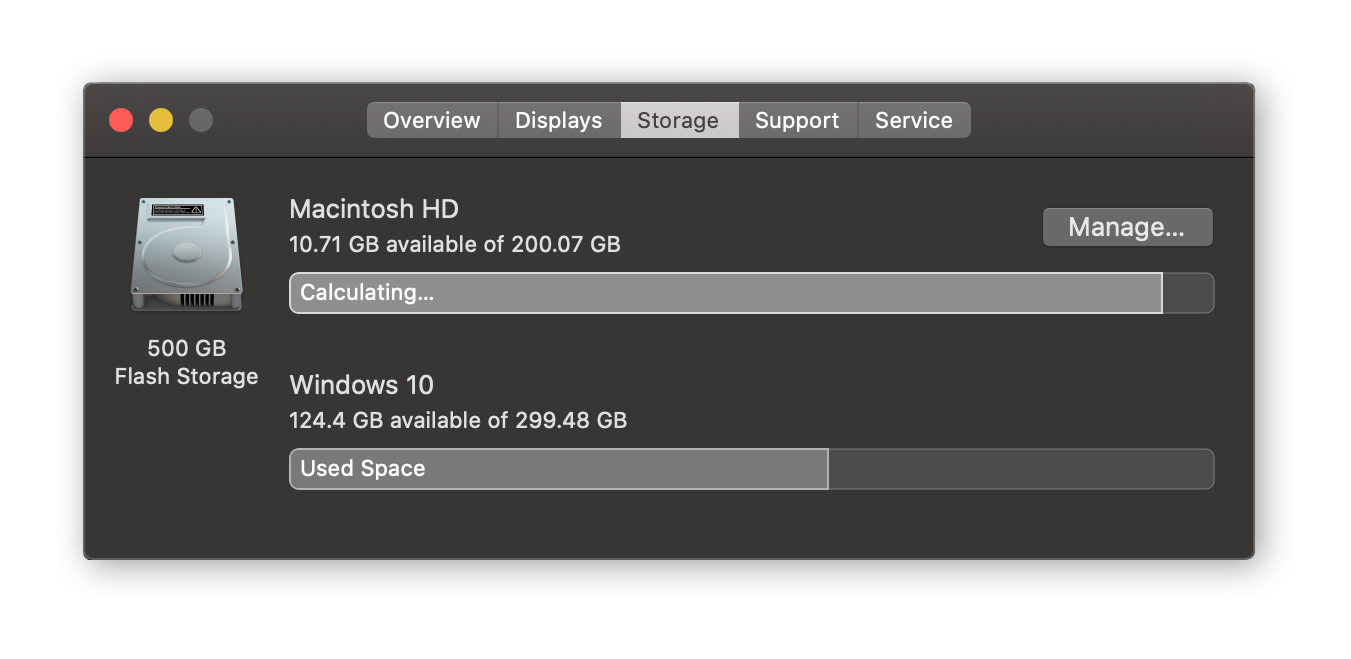 Next, click on Storage and Manage. From here you’ve got a few options. Let’s start with the first option, iCloud. If you’ve signed up for Apple’s cloud service, you can store your entire Desktop and Documents folders, Photos, and iMessages (plus attachments) in the cloud and access them online. This could save you gigabytes’ worth of storage space on your computer.
Have you purchased any TV shows or movies from iTunes or Apple TV? Hit the Optimise button to remove anything you’ve already watched. We’d also advise you to hit the Turn On button next to Empty Trash Automatically, which will get rid of files from your Trash after 30 days. It’s highly unlikely that you still need files you’ve removed over a month ago, right?
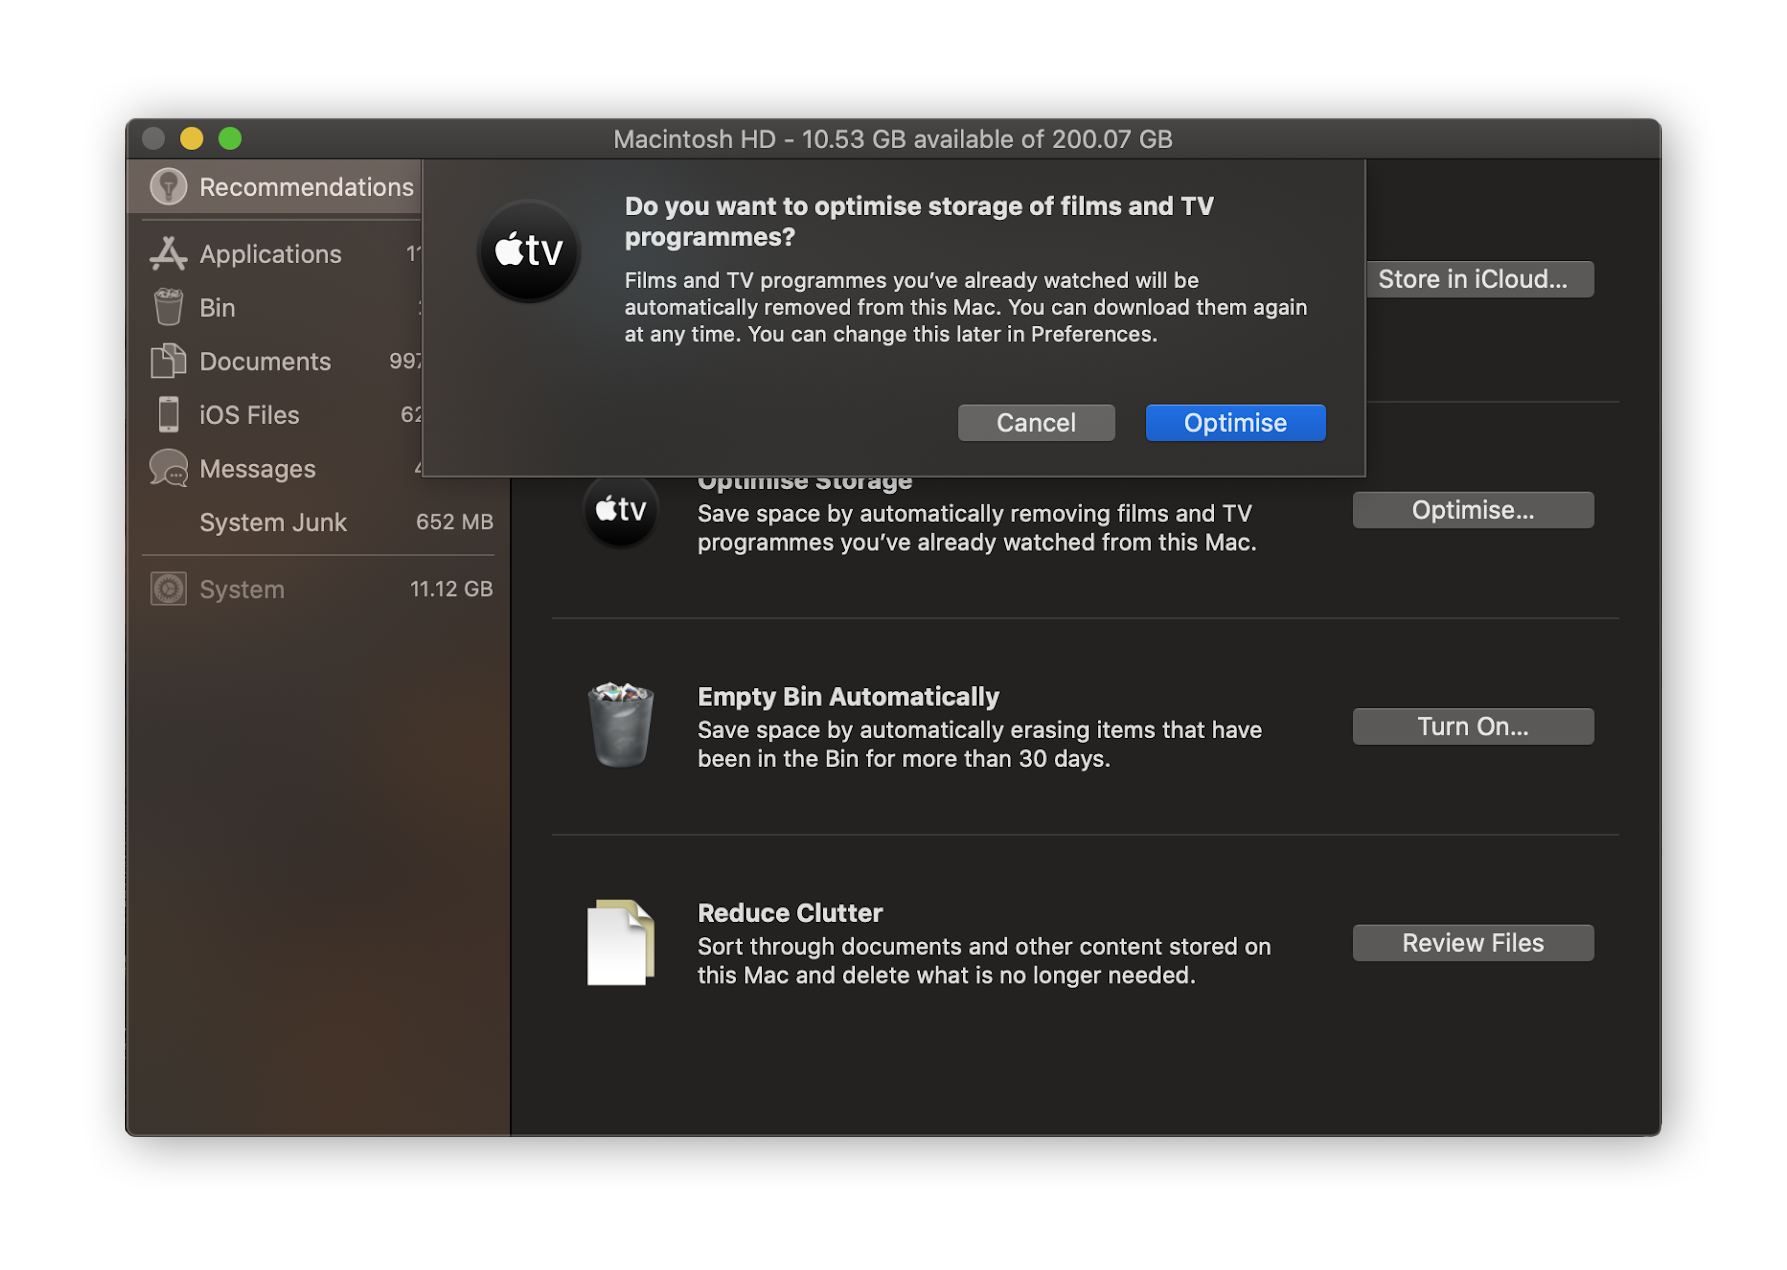
Let’s move to the last recommendation: Review Files. This will scan your hard disk for Large Files, Downloads, and Unsupported Apps. The process might take quite a while, depending on your hard disk’s performance, and it will take even longer to go through the files and delete them one by one. But in the end, you’ll enjoy a clean Mac with more free space.

Next up, let’s look at iOS Backups. You can back up all your iOS devices either to iCloud or locally to your disk. If you’ve chosen to do the latter, you’ll have tons and tons of files on your disk as your entire iPhone or iPad is being backed up, meaning that we’re talking about dozens and dozens of gigabytes. To get rid of backups you no longer need, click on iOS files and hit the Delete buttons on age-old backups.

Time to take care of your Messages. Every photo, video, or document you send or receive through iMessage and group chats is stored here. As you can imagine, this situation can quickly grow out of control, as seen in this example: we’ve got almost 5 GB eaten up by iMessage attachments. You can delete all of these, assuming you no longer need them.

Now that you’ve cleaned up a load of data, it’s time to look at your hidden temporary files. To find them, we’ll use Avast Cleanup for Mac, which thoroughly scans your computer for temporary data. Get it here:
Once you’ve completed the installation, hit the SCAN button under Clean clutter on the main dashboard. This will scan macOS and all your apps for redundant cache files, log files, and trash data. These are usually well hidden on your hard disk, sitting in obscure folders you’d never find yourself. Even if you could find them, it’d take hours to hunt them down every few days to remove new temporary data.

Hit the CLEAN button to ditch that data. Next, it’s time to attack the clones: duplicate files! These are files that are identical to another, such as videos or documents you’ve accidentally copied. Go back to the dashboard and click Find, next to Find duplicates. Select your user folder, your entire hard disk (this will take a while!) or even external hard disks (which will take even longer!). Hit the SCAN button and… wait!
Once complete, you can go through the list of duplicates found and delete all the cloned files you no longer need.

Last but not least, it’s time to take a look at your photo library: In the age of massive smartphone storage, it’s easy to take dozens of photos when just one would get the job done. After all, there’s plenty of room! But some of these shots might be nearly identical, while others look blurry, oversaturated or just plain bad.
In that case, our Photo Cleaner is here to help. Go back to the Avast Cleanup dashboard and hit the Find button under Find photos. Chose all locations where you’ve stored your photos. You can now choose Review to see either Bad photos or Similar Photos:  The next screen will show you poor or blurry photos:
 Mark the ones you don’t need and remove them!
Oh, you’ll know! Once this dreaded message pops up, you’re way beyond the point of needing to clean up.
 At this point your Mac will start to act up: You won’t be able to save a whole lot of files anymore, applications that require more space could stop working, and your performance might decline quite drastically.
In our tests, we had some major issues with performance when disk space was less than 500 MB:
Geekbench* (normal): 3301 points
Geekbench (low disk space): 2511
Startup time (normal): 34 seconds
Startup time (low disk space): 55 seconds
Geekbench (normal): 3901 points
Geekbench (low disk space): 3001
Startup time (normal): 16 seconds
Startup time (low disk space): 32 seconds
*Geekbench measures performance and gives your Mac a score so you can compare it to others. The tool is available for free over at //www.geekbench.com/.
As you can see, we’re talking about a massive hit in performance if disk space goes down. This is caused by macOS and its programs not being able to allocate enough virtual memory — a process that uses your hard disk’s memory as an extension to your RAM). By the way, if your Mac isn’t running out of disk space but still feels sluggish, check out our tips to boost its performance.
Your other devices — PCs, Androids, or iOS devices — are also likely to be in need of a good cleaning. Here’s how you can spring-clean all your other devices:
A Mac cleanup isn’t a one-time thing — you should be cleaning out your computer on a regular basis. Avast Cleanup for Mac automates the cleanup process, purging your computer of junk files, duplicates, unwanted apps and unneeded photos for you. A cleaner Mac runs faster, holds more data, and delivers the performance you expect.